Imagine a rich, savory brown gravy gracing your mashed potatoes, roasted turkey, or even your favorite poutine. Now, imagine whipping it up from scratch in just 10 minutes, without a single pan dripping in sight. Sounds like a dream? Not anymore! This recipe for easy brown gravy without drippings is a game-changer, proving that homemade doesn't have to mean complicated or time-consuming. Get ready to elevate your meals with a velvety, flavorful sauce that tastes like it took hours, but truly comes together in a flash.
Why Master This Easy Brown Gravy? No Drippings, No Stress!
For many home cooks, gravy can feel like a daunting task, often reserved for special occasions when there are meat drippings aplenty. But what if you crave that comforting, umami-packed sauce on a Tuesday night with a simple roasted chicken, or want to make it for a vegetarian friend? That's where this incredible easy brown gravy recipe shines.
- No Drippings Required: This is the ultimate convenience. You don't need to roast a whole bird or a pot roast to enjoy homemade gravy. Simply use quality beef broth as your flavorful base.
- Ready in Under 10 Minutes: Forget those powdered packets! With just a few simple steps, you can create a superior sauce faster than it takes to preheat your oven. Perfect for busy weeknights or when unexpected guests arrive.
- Unbeatable Flavor: We're not just thickening broth; we're building layers of savory goodness with everyday pantry staples like onion powder and garlic powder. The result is a gravy that far surpasses any store-bought alternative in depth and richness.
- Incredibly Versatile: While it's a holiday table essential for Thanksgiving and Christmas, this gravy is equally at home on everyday dishes. Think smothering mashed potatoes, enhancing roasted vegetables, topping country fried steak, or even as a base for poutine.
- Lump-Free Promise: We'll walk you through the simple techniques to ensure your gravy is perfectly smooth and silky every single time.
Embrace the joy of effortless homemade cooking. This recipe will quickly become your go-to for flavorful brown gravy from scratch, proving you don't need a lot of fuss to achieve gourmet results.
The Anatomy of a Perfect Easy Brown Gravy (Without Drippings)
The magic of this easy brown gravy lies in its simplicity and the intelligent use of foundational ingredients. We focus on a classic thickening method called a "roux" combined with strategic flavor boosters.
Key Ingredients & Their Role:
You only need 5 core ingredients to create this incredibly flavorful sauce:
- Unsalted Butter (3-4 Tablespoons): Butter forms the fat base for our roux, providing a rich, creamy flavor and helping to brown the flour for a deeper color. Using unsalted butter allows you to control the overall saltiness of your gravy.
- All-Purpose Flour (3 Tablespoons): This is our primary thickener. When cooked with butter to form a roux, it creates a stable, smooth base for the gravy.
- Low Sodium Beef Broth (2 Cups): The backbone of our gravy's flavor. Opting for low sodium is crucial, as it gives you control over the final seasoning. A good quality beef broth will provide a robust, savory foundation, making drippings completely unnecessary. You can also use beef stock for an even richer taste.
- Onion Powder (1/2 teaspoon): This provides a concentrated, savory onion flavor without the texture or cooking time of fresh onions. It's a secret weapon for depth.
- Garlic Powder (1/2 teaspoon): Similar to onion powder, garlic powder adds a foundational layer of aromatic flavor that beautifully complements the beef broth.
Roux vs. Slurry: Why We Choose a Roux for This Recipe
When it comes to thickening sauces, two common methods are a roux and a slurry. While both work, they offer different characteristics:
- Roux: A roux is a cooked mixture of fat (like butter) and flour. It's cooked until the flour loses its raw taste and can even be browned for a nuttier flavor and darker color, as we do in this recipe. A roux provides a wonderfully smooth, stable thickness and contributes to the overall flavor profile. For our easy brown gravy, a simple butter-flour roux is ideal because it develops a depth of flavor that a slurry doesn't.
- Slurry: A slurry is a mixture of a starch (like cornstarch or flour) and cold liquid, which is then whisked into a hot sauce to thicken it. Slurries are quick and gluten-free if using cornstarch, and they don't add additional flavor, making them ideal when you want to preserve the pure taste of your base liquid. However, for building a robust brown gravy, the browned butter and flour in a roux are indispensable for that classic flavor and texture.
By opting for a quick roux, we ensure our gravy has that authentic, deeply satisfying texture and taste that store-bought options simply can't replicate.
Your 10-Minute Path to a Flavorful Easy Brown Gravy: Step-by-Step
Let's get cooking! This simple process will have you enjoying luscious, homemade gravy in no time.
Ingredients:
- 3-4 Tablespoons unsalted butter
- 1/2 teaspoon onion powder
- 1/2 teaspoon garlic powder
- 3 Tablespoons all-purpose flour
- 2 cups low sodium beef broth (or beef stock)
- Salt and freshly ground black pepper to taste
Instructions:
- Melt the Butter: In a medium saucepan, melt the butter over medium heat. Don't rush this step; let it fully melt and shimmer.
- Create the Roux: Once the butter is melted, sprinkle in the flour, onion powder, and garlic powder. Immediately whisk vigorously for 1-2 minutes. Continue whisking as the mixture bubbles and thickens, cooking until it forms a light golden-brown paste. This is your roux, and cooking it properly ensures your gravy won't have a raw flour taste.
- Gradually Add Broth (The Key to No Lumps!): Slowly pour in about 1/4 cup of the beef broth while continuously whisking. This initial small addition will create a very thick paste. Keep whisking until it’s smooth and lump-free. Once smooth, gradually pour in the remaining beef broth, whisking constantly to incorporate it fully. This gradual approach is critical for a silky-smooth gravy.
- Simmer and Thicken: Bring the gravy to a gentle simmer over medium heat, continuing to whisk occasionally. As it heats, it will begin to thicken. Let it simmer for 3-5 minutes, or until it reaches your desired consistency. Remember, gravy thickens slightly more as it cools.
- Season and Serve: Taste your gravy and season with salt and freshly ground black pepper as needed. If you used low sodium broth, you'll likely need to add a bit of salt. Serve your beautiful, silky smooth gravy hot!
Pro Tip: The Velvety Finish (Monter au Beurre)
For an extra touch of richness and a truly velvety finish, consider a chef-inspired technique called "monter au beurre." Just before serving, remove the gravy from the heat and swirl in a pat (about 1 tablespoon) of cold unsalted butter until it's fully melted and incorporated. This emulsifies into the gravy, adding a beautiful sheen and luxurious mouthfeel without making it greasy. It’s an optional but highly recommended step for gourmet flair!
Tips and Tricks for Gravy Greatness
Achieving the perfect gravy is simple with a few insider tips:
- Preventing Lumps is Paramount:
- Always add cold or room-temperature liquid to a hot roux, or hot liquid to a cold roux. In our case, the roux is hot, so room temperature broth works perfectly.
- Add the liquid gradually, starting with a small amount to make a smooth paste before adding the rest.
- Whisk, whisk, whisk! Constant, vigorous whisking is your best friend.
- Adjusting Consistency:
- Too Thick? Whisk in a tablespoon or two of extra beef broth or hot water until you reach your desired consistency.
- Too Thin? Make a small slurry with 1 teaspoon of cornstarch mixed with 1 tablespoon of cold water. Whisk this mixture into your simmering gravy and cook for another minute or two until it thickens.
- Flavor Boosters (Optional):
- A Dash of Umami: A splash of Worcestershire sauce or a tiny pinch of dried thyme or rosemary can add even more depth.
- Mushroom Magic: For an earthy note, stir in 1/4 teaspoon of dried mushroom powder.
- Bouillon Power: If your broth lacks punch, dissolve half a teaspoon of beef bouillon paste or powder into it before adding.
- Reheating: Gravy tends to thicken as it cools. To reheat, gently warm it on the stovetop over low heat, whisking constantly. If it's too thick, add a splash of broth or water until it reaches the desired consistency.
- Storage: Store leftover gravy in an airtight container in the refrigerator for up to 3-4 days. It can also be frozen for up to 3 months. Thaw in the refrigerator and reheat as directed above.
- Serving Suggestions: This versatile gravy is fantastic with:
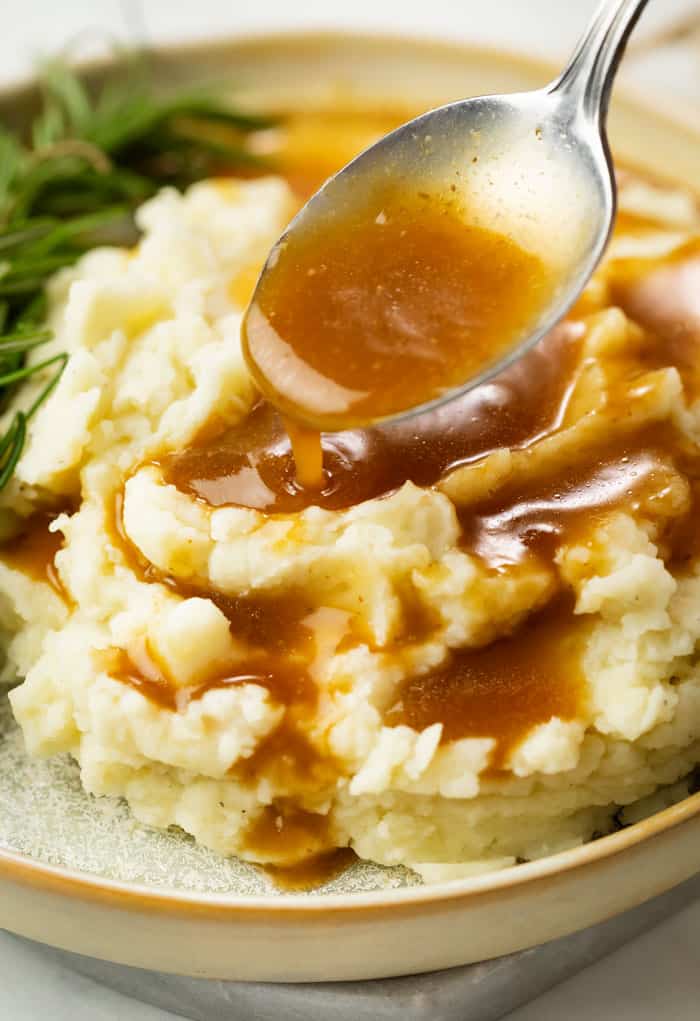
- Mashed Potatoes or Sweet Potatoes
- Roasted Turkey, Chicken, or Pork
- Meatloaf or Country Fried Steak
- Biscuits and Gravy
- French Fries (hello, Poutine!)
- Steamed or Roasted Vegetables
Conclusion
Say goodbye to bland, store-bought gravy and hello to the incredible flavor and ease of homemade! This easy brown gravy recipe, requiring absolutely no drippings and just 10 minutes of your time, is a true kitchen hero. With a few simple ingredients and techniques, you can confidently create a rich, smooth, and savory sauce that will impress family and friends alike. So go ahead, whip up a batch, and transform your everyday meals into something extraordinary. Your taste buds will thank you!
